Sunday, 4 October 2015

Chapter 3 Free machine embroidery

Used Module 3 as a reminder on how to set up my machine for free machine embroidery.  Also used a couple of reference books:
Alison Holt 'Machine embroidered seascapes', Search Press, 2012
Valerie Campbell-Harding & Pamela Watts 'Machine embroidery: stitch techniques'  Batsford  pp52-59 for cable stitch

I produced 4 Samplers in all, demonstrating straight stitch, zigzag stitch, whip stitch and cable stitch.
Each sample was using calico, prepared with a hoop, free machine foot, and using 100 needle.  I lowered the teeth.
Each sampler had a grid of 16 squares 3cm x 3cm and 4 X 4.
I selected samples using photographs from the Introduction and from Chapters 1 & 2.
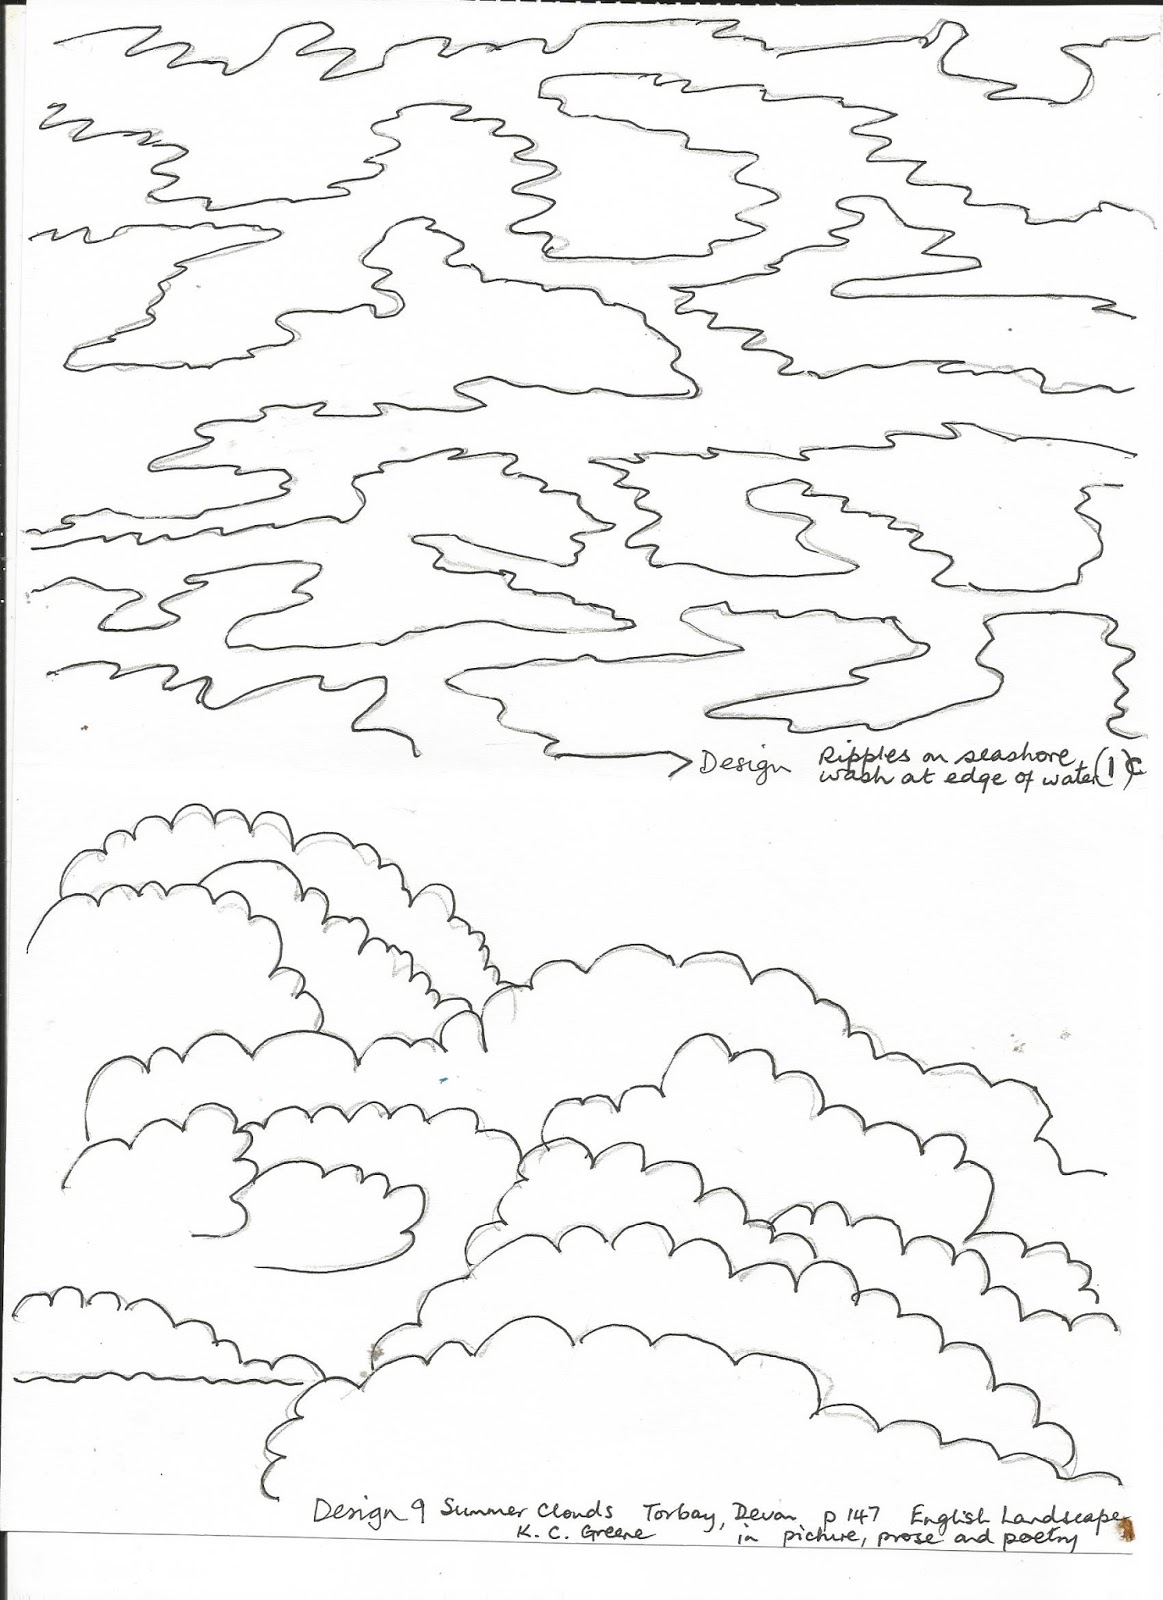
The top two lines of the grid depicted skies and clouds, the bottom two lines water.  Where possible I tried to vary the colours to reflect the different skies and waters
On a written grid matching the sampler in my notebook I recorded the coloured threads used, upper and in the spool, mostly Gutermann machine threads, thicker threads for the cable stitch, tensions and stitches and sometimes the patterned effects.

Sampler 3.1 Using straight stitch.
The tension was meant to be the same, I used 2 for both the upper and lower tensions, however the tension was more balanced for stitching when I changed to 3 upper and 2 lower.  Some of the earlier ones resulted in looser threads at the back of the piece.


I didn't always have contrasting textures next to each other but tried to vary the textures as much as possible.
Ideally I should have covered the fabric more, but at least the water or cloud patterns showed up well.
The background colour was the colour of calico, other coloured fabrics or layers of stitching could have been worked to give variety to this background.

Sampler 3.2 Using zigzag stitch and whip stitch
Similar approach to Sampler 1, but used the zigzag design on the machine and mostly the longer length 5 or 6.
The tension for the lower spool was 2 and the upper tighter using firstly 9 then 7, for the whip stitch.  The latter seemed to work better.  I pressed faster speed on the peddle and slowly moved the cloth using the hoop as a guide.  At other times allowed the zigzag to cross further over the fabric.

 
Liked the way you sometimes have glimpses of the aquamarine coming through from the spool thread with whip stitch on to the white depicting froth or foam on the water.
 
Sampler 3.3 Using a mixture of stitch techniques ( not cable stitch)
In this sampler worked from the bottom lines upwards.  As I reached the top row wanted to capture the different colours in the skies.  My notebook grid explains which stitch was used where and colours used for the upper and lower threads.
By now I had referred to Alison Holt's where she recommends turning the fabric 90 degrees and working up and down rather than across, which worked so much easier.
 
 
I feel I'm now beginning to use more dense stitching and layering and more variety of colour.
As well as using pictures from earlier chapters I notice skies more and consequently try to capture evening patterns not able to photograph but captured as soon as possible after seeing them.
 
Sampler 3.4 Cable stitch
This time worked from the back of the calico fabric in order to use thicker threads in the spool to show on the right side.
Some samples produced well textured results but this was probably because I didn't get the tensions right, producing some  very loose top threads (see the lower row)
I managed to alter my technique from tightening and highering the top tension to get rough cable stitch, to actually changing the lower spool holder and properly loosening the tension on the screw.  Used a separate spool holder, which I will keep for this work.
 
I did not work in just one direction on the sampler.  As I tried different colours I used the most appropriate square for the water and sky.
I began to get a better couched effect.  I like the ability to use some lovely textured threads.
I feel a little more confident changing the spool holder for this technique.
 
I feel I managed to get a mixture of textures through out the samples, and hope to develop this in later work.
I will need to vary the colours especially in the waters for more grey or brown effects.


Friday, 18 September 2015

Chapter 2 Designing with shapes and layers

There are three sections in this chapter related to water and sky:
  1. Making a collection of papers
  2. Identifying simple shapes and patterns
  3. Design development using papers with shapes and patterns
This evolved from first selecting about 8 images from photographs showing different colours in water and sky alongside different aspects of water and sky.  I worked first through section 1, then went to section 2 followed by section 3.

The document above is from my notebook.  Each photo image was labelled having selected 1,2 or 3 linked images and then papers were made all A4 size using mark techniques used in chapter 1 appropriate to each image.  On the sheet are those papers including techniques used.  In order to coordinate the work rather than showing each section separately I decided to blog all three sections together for each of these images.  The next sheet are notes for the design development stage showing the sequences of tearing or cutting to make the final sheets.  I also tried to find background coloured papers appropriate on to which the cut shapes were stuck with prittstick.  I tended to use A5 (half sheets) sometimes resulting in a new A4 sheet when combined.


Photo image 1 Pebbles next to the shore
Papers


 Shapes & patterns
Design development
I decided to tear the shapes as I felt this was more appropriate for the wash on a shoreline.


Note the subtle effect from one sheet overlaying the strong pebbles on the second sheet.  An additional cutting of the patterned papers add another layer forming another watery image.
 

Photo image 2  Rich blue seas
 
Papers

 
Here should also be included a piece of sgraffito, but I forgot to photograph or scan it before cutting it up.  It can be seen in design development stage.
 
Shapes and patterns

 Design development

 
In these two pieces I've combined the sgraffito piece with the frottage, cutting the pieces for more emphasise on the waves.  The one above shows the two layered shapes placed together the one below staggering columns to emphasise the waves even more.

Photo image 3 Reflections
Papers


 Shapes and patterns
Design development


I played around with some of the patterns using the Windows 10 picture package
 
.
 
 
Photo image 5 Brown river or canal water
 
Papers 


Shape and pattern 
Design development


It does not show very well but the last piece is cut and staggered on aluminium foil giving a glittery effect of a watery sun on the brown waters 
 
Photo image 5 Waterfalls on brown/green river
 
Papers


Shape and pattern
Design development
 
I also tried another cut and design which I felt didn't work too well (see below).  I liked the top one but not the bottom


Photo image 6 Grey seas, skies and waterfalls
 
Papers


There is no shape and patterns or design development for this, however Photo image 8 relates well to the clouds effect
 
Photo image 7 Ripples in a pond
 
Papers

Shape and pattern
Design development


I played around with some of the patterns using the Windows 10 picture package giving reflected images on the first and repeated like images on the second.  I was particularly surprised by 'inversion' resulting in the blue and purple effects on black (complementary colours).


Photo image 8 Grey clouds and sea

Papers - see those for Photo image 6

Shape and patterns
 
Design development


These images have come out brown rather than grey, which may be because the brown table reflected with the camera when taking the picture.  The pieces were different tones of grey! not sepia!
 
Here are another couple of shapes that might be of use another time:


I tried to explore different shapes and patterns and using different design development.  Although most were related to water I might like to develop clouds and skies more in the future, especially skies that are not just blue, white or grey.