From work completed in Chapter 8 I have now selected two main designs to work from, either to be used separately or combined. They are the top ones on each sheet shown here - Design A and B


They are simple designs but through design development can be varied in appearance.
I am considering producing a wall hanging of three layers, to hang over one another, but because they will be displayed on an opening towel rail arrangement, different layers will appear according to how the hanging is opened.
Colour
Colour is important, with different ones related to the three different layers. Each layer is different depicting how the Clean Air Acts have resulted in an improvement in air quality. The colour ranges will include light and dark tones, with some complementary colours.
Alongside the colours selected for each layer is an indication of the symbolism within each, using as reference sources - 'Brewer's dictionary of phrase and fable' and Sandra Meech 'Contemporary quilts: design, surface and stitch'. Batsford (2003) 2005.
Top layer:
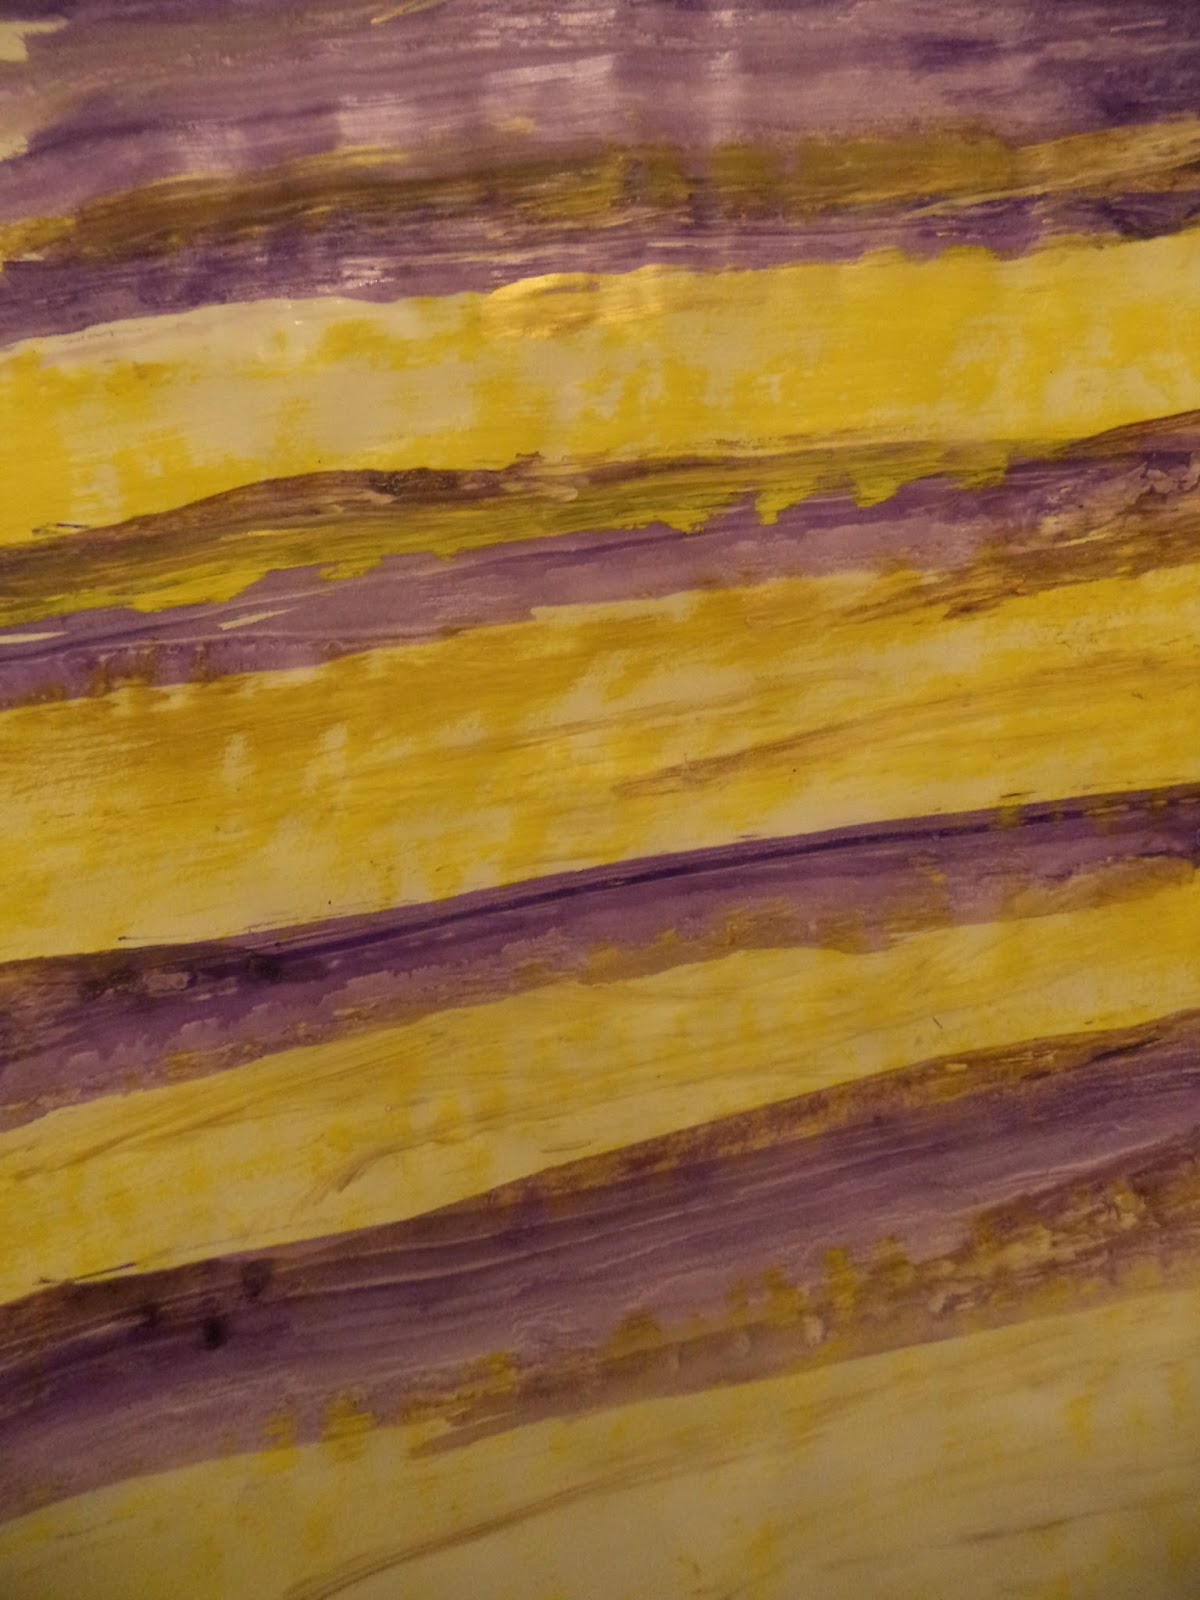
Depicting the smog and murky colours of the Great London Smog in 1952, also has colours relevant to sunset, the dying end of a day (the need to end the deadly air pollution). Clean Air Act 1956
Colours chosen:
Black: symbol of evil, falsehood and error (smog and black smoke)
with tonal change through darker to lighter greys
Hints of purple and yellow (sunset)
Purple: symbol of justice with its complementary colour
Yellow: can denote faith, constancy, wisdom or glory and in art, jealousy and inconsistency.
Turner used sunset in his 'The fighting Temeraire' (1838) a ship being taken to scrap
A hint of gold and is the metal that links with yellow
Middle layer:
Depicts some improvement in air quality. Clean Air Act 1968
Colours chosen:
Tonal changes in grays with some white
Hints of blue and browns with greens
Blue: symbol of hope - for the future
Brown: symbol of stable inner harmony
Green: hope and joy
Copper is the metal that links with green
Bottom layer:
Depicts an even more improved air quality. Clean Air Act 1993
Colours chosen:
Blue: symbol of hope - for the future
with tonal changes through different shades of blue to pale blue and white
Pale blue: symbolises peace
White: symbolises purity and cleanliness
Hints of silver is the metal that links with white
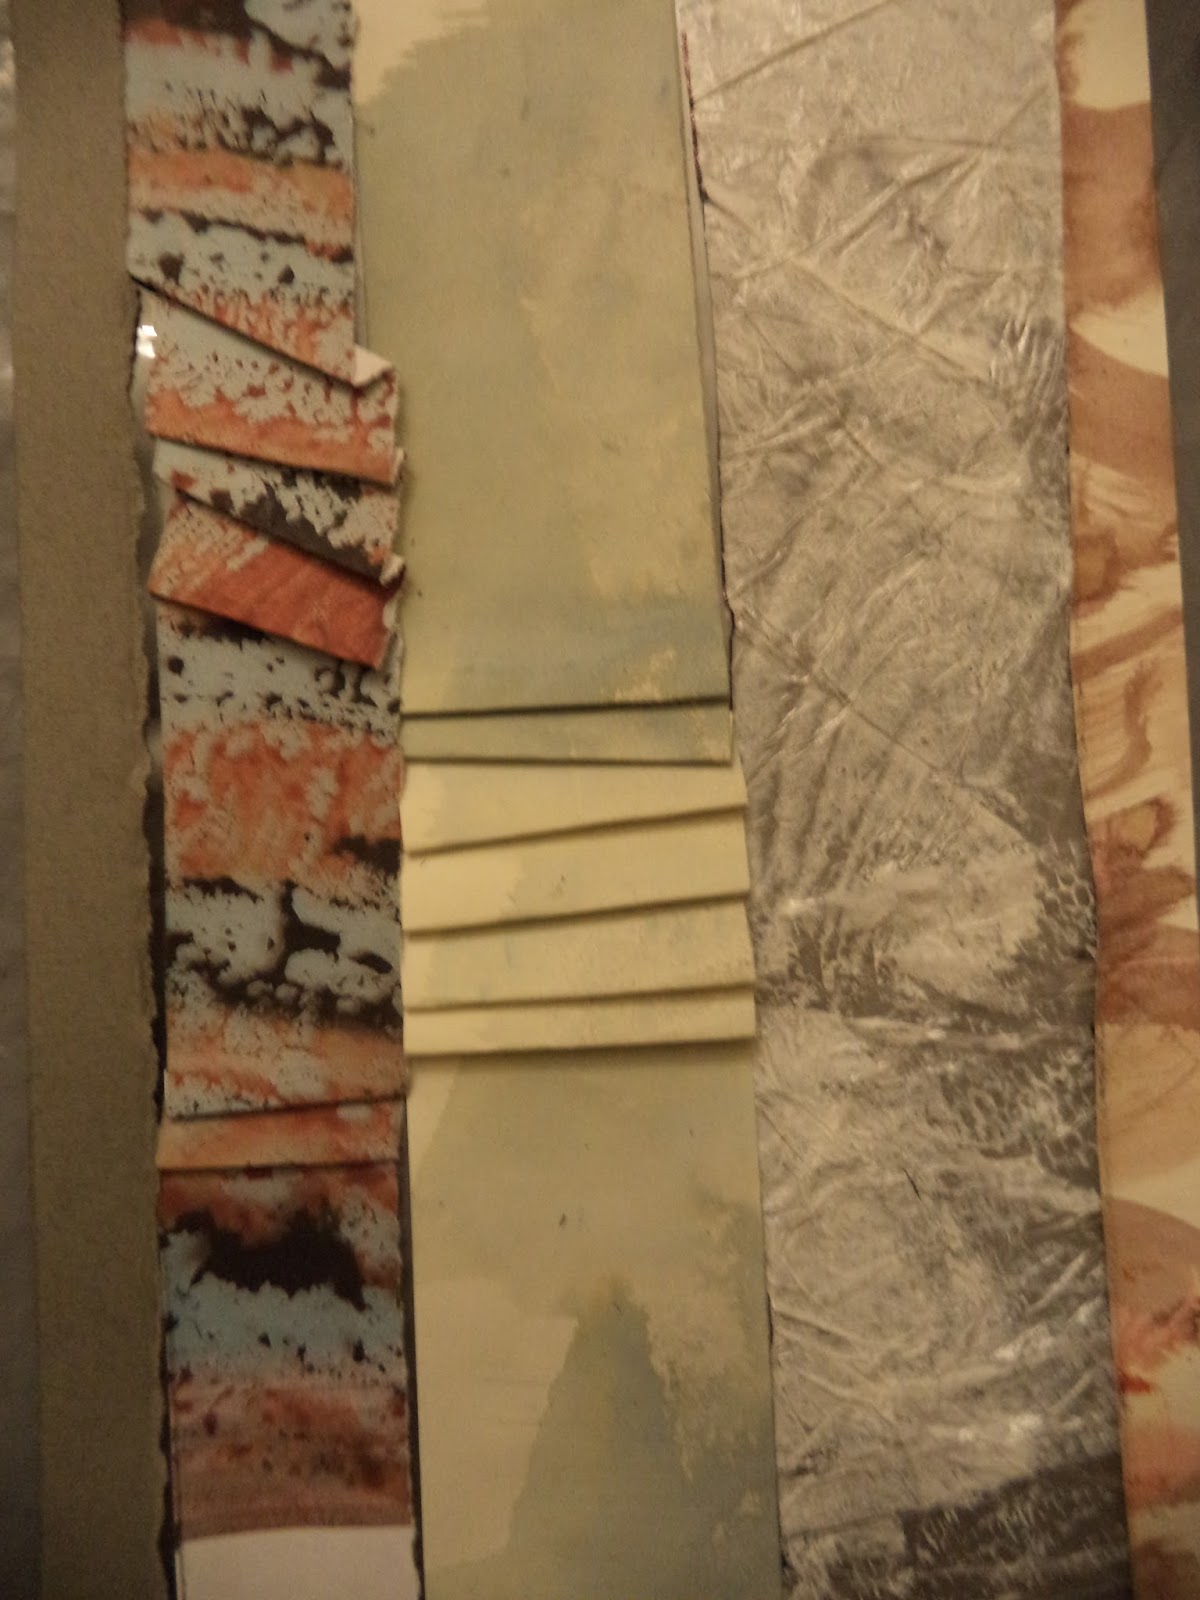
Making a selection of papers for design development
Having selected the colours to be used, A3 sized papers were made for each layer. Each A3 paper depicted a different colour, with line and texture and tonal variation.
The final piece will be made up with patterns but the elements in each layer are related to sky, clouds, smoke, chimneys, water and will include reference to the Ringelmann Smoke chart (which monitors the colour of smoke)
Various papers, colouring methods and mark tools were prepared resulting in the following
Here I am using PVA glue to attach tissue paper to cartridge paper for a bottom layer sample to give tonal blues.

Top layer
 |
| Black inks with different water dilutions then sponged over with bleach. Quink ink allows bleaching, the darker Khandahar ink is more resistant to bleaching |
 |
| Oil pastel patterned base as a resist overlaid with acrylic paints, given a final layer of PVA glue |
 |
| On plastic wallet, using a wave edged mask sponged black, white and gold acrylic |
Middle layer:
 |
| Oil pastel cloud shaped marks as resist then painted over with diluted Quink Ink |
 |
| Using thin plastic bags, painted one layer with acrylic gesso then sandwiched it together with another bag allowing to dry with creases |
|
| Same layer as top layer but to use overlaying one or other of the next two |
 |
| Using brown wrapping paper, frottaged using three print blocks and different green oil pastels. finally sponged using used teabags |
 |
| Mixture of Winsor and Newton brown ink, frottaged brown oil pastels and wiped across with bleached cloth |
 |
| Wave A3 sheet overlaying brown ink A3 sheet |
Bottom Layer
 |
| Dry brushed blue and white acrylic overlaid with occasional sponge effect in white acrylic |
 |
| Four different tissues to give a tonal range of blues to white attached with PVA glue, let to dry then brushed over with bleach |
 |
| On plastic wallet, using a wave edged mask sponged watered down blue, white and silver acrylic |
 |
| Bubble wrap washed over with waves of acrylic white gesso |
I also made some print blocks and using acrylic paints and Quink ink, used the blocks and rollers to transfer on to white tissue paper, to use as they are or overlaying other papers. I also did one or two monoprints.
Here are the print blocks and a sheet of tissue with several prints. Some did not work at all well others were more successful.
 |
| Intaglio prints. Two using card the right one cutting away tile |


Design development for Design A
To develop the design I referred to the inspiration boards, working as if there are three columns depicting each layer top to bottom, left to right, producing initially a design per column or layer. I used additional papers as in Chapter 8 as well as those above.
 |
| Each A5 sheet laid horizontally, in sequence left to right |
 |
| Same sheets staggered and slightly overlaid |
 |
| Same sheets laid vertically |
I then made a further three sheets. all A5 using different combinations of papers relevant to the columns, layers, but attached then in book form to give an idea of being on the towel rail. Cut each section across each wave and could alter the sequence.
 |
| Top layer and front of book, each curve cut and book held together with purple wool |
 |
| Second page or middle layer |
 |
| Third page or bottom layer |
 |
| Different sections opened. Top to bottom samples from top, middle and lower layers. It also shows that the back of sections can be too plain. Need to resolve this problem |
A third sequence of sheets were made but this time A4 size and incorporating the hints of colour between sections
 |
| Top layer with a tissue section and print (Not clear print) |
 |
| Middle layer |
 |
| Bottom layer |
 |
| Showing opened section the back of the middle layer and the bottom layer. The back of the pieces show a pattern as well as the front. Used OHP plastic sheets so the backs show through. |
Design development for Design B
Initially I produced A5 samples again arranging them to depict a top, middle and bottom layer for the wall hanging.
This time the coloured papers were incorporated into strips using the Fibonacci sequence and OHP sheets.
Each layer has the same width strips, 1, 2, 3, 5, 5, 1. It was helpful to have a sheet to follow with lines marked on it, which could be place under the OHP plastic. The hints of colour were also incorporated. On the top sheet these were the complementary colours of purple and yellow. Middle layer his was brown and green(under the wave effect) and some blue. Bottom layer silver.
.
 |
| Original coloured sheet made in Chapter 8 with Design B |
 |
| This is the top layer and as well as selecting coloured papers I have also included some pleating and use of a chimney print |
 |
| This is the middle layer, with the strips beginning to be more varied and interesting pieces |
 |
| This is the lower sheet |
 |
| This picture shows the sheets placed alongside one another. The lengths on each sheet are allowed to extend above and below. |
 |
| Each sheet overlaid and staggered |
 |
| Each sheet overlaid vertically. This is almost a smaller example of how I see the final wall hanging. Each layer different lengths |
Following on from these samples I then made some A4 examples, adding further pleating, prints, text and could add illustrations
Here I am preparing the lower sheet, gluing strips on with Prittstick. OHP sheets were used again and another A4 marked plain paper used to align strips. This time the Fibonacci sequence was 1,5, 8, 3, 3, 1 with some variation between each layer

 |
| Three sheets laid alongside one another; Top sheet, middle and lower sheet left to right |
 |
| Three sheets laid vertically with strips going horizontally as well |
 |
| Top layer with prints and text and added dissolvable fabric sample |
 |
| Middle layer with pleats, prints, text, cloud effect and grid overlays (in gel pen) At the right edge is a layered cut away fabric from Chapter 7 |
 |
| Bottom layer with smaller pieces of waves overlaying another, chimney print, smoke effect and grid and dissolvable fabric waves from Chapter 7 |
I see the top layer being shorter than the middle which is shorter than the bottom or back layer.
Using Design development for Design B I could use either the final designs on A4 or those on A5 with the additional enhancements as on A4 pieces.
I like the idea of vertical strips, needing to keep to the Fibonacci sequence to ensure the strips look balanced, although each layer or repeats could be different sequences
I could either elongate the one design for each layer or repeat them
For example the top layer could be A3 in size, the middle layer 2 lengths of A3, the bottom layer 3 lengths of A3.
The width can be no more than 30 cms as this is the length of the towel rail rods
Where possible I want to use shear or fine fabrics, using manipulated fabric or dissolvable fabric and stitching. One idea is to use the dissolvable fabric where chimney smoke should be to create grids as in a sample in Chapter 7, black metallic thread on the top layer, grey on the middle and white on the bottom layer.
Using the OHP indicates what the back of the layers will look like, hopefully with added stitch they will blend in well with each lower layer.
Finally rather than giving severe edges to each layer I could incorporate the wave design in design development from Design A so they each hang interestingly.
The text I might incorporate could be taken from the sheets below:


