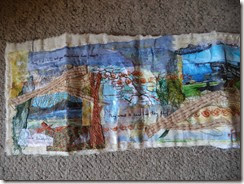
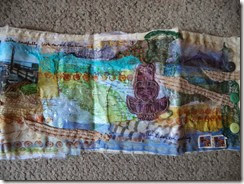
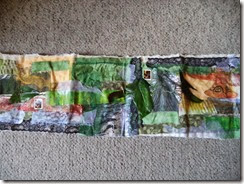
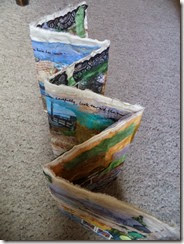
This chapter is about making paper from recycled media related to music.
Section 1: Paper making techniques
Two methods were used Method A or Method B, as described here and in my notebook. Health & Safety are given in the notebooks.
The pieces of paper produced are roughly 10 cm across and 15 cms long, using a fine metal mesh as used in car repairs, same size to lift the pulp.
Section 2: Selection of samples: Plain paper & Interesting effects
- Plain paper
- Embedding
- Laminating
- Fringing
- Embossing
- Coloured pulps
Section 1: Paper making techniques
Torn stamp sized pieces from recycled paper other than 1.
- Cartridge paper
- Cardboard (brown packaging from posted CDs or DVDs)
- Covers from old music scores
- Old music scores (torn music pages – browning with age)
- Old photocopied lined music manuscript
- Brown paper packaging (recycled decorated pieces – mixed one with red design the other with gold layer on one side)
- Newspaper
- Leeks
- Mixed Record sleeve pulp with waste Dylon dye
Method A
Requirements
- Approximately A4 quantity of torn paper kept separate from one another
- Large old saucepan (no longer needed for cooking), half filled with water
- Old wooden spoon
- Hand blender (to use with embroidery projects only)
- Deep tray for made paper pulp
- Waterproof to cover surface
- Old towel
- Kitchen cloth towels (e.g J Cloths) to lay wet paper samples on to dry and to remove moisture from samples
- Aluminium mesh (pieces 10cm x 15 cms)
- Large fine sieve
- Other items net, different sized net grids, items to lay paper over, threads, lace, small bits of music related papers, sequins or beads
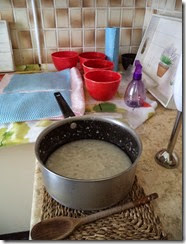
Showing the blitzed pulp in the pan ready for pouring into the vat, wooden spoon and kitchen cloths, used in Method A
Method
- Simmer torn paper in pan for 1 hour, then allow to cool a little
- Using hand blender to blitz the mixture in the pan (not too long just to break up softened paper – leaving some bits in tact for texture)
- Pour mixture into plastic tray big enough for using mesh (Add some extra warm water if pulp is very thick (half of pulp amount))
- Place about 4 or 6 kitchen cloths on top of an old towel, on top of waterproof cover to protect surface
- Stir the pulp with wooden spoon
- Take the metal mesh, place at right angles at edge of vat, carefully take under the surface of the pulp, gently move to collect pulp to cover the mesh
- Lift out flat so excess water can drain out of the pulp
- Lay upside down on kitchen cloth
- Press with extra kitchen cloth to flatten paper
- Remove mesh by removing any pulp that has curled over the edge of the mesh with your finger (gently brushing it outwards where necessary) then easing up a corner peel back the mesh. The paper stays on the cloth and comes off the mesh. Some practice is required but it does come right. Found the back of my thumb nail was also very useful when easing off any curled pulp or helping the pulp stick to the kitchen cloth
- Leave the resulting paper to dry naturally
(I found it useful to carefully remove the towel to help with the drying process – some pieces could be placed on a dryer clinging to the kitchen cloths)
12. Once dry it is relatively easy to peel the resulting paper off the kitchen cloth
13. Repeat this technique using interesting effects as described in Section 2
14. To save unused pulp and prevent clogging up the drains pour pulp through a fine sieve into the sink
15. Knock the sieve contents on to a spare kitchen cloth, then after a short while roll into a ball (using cloth initially) then hands, squeeze out excess water and leave to dry naturally (make sure totally dry), to reuse another time
Method B
Requirements
- As Method A except rather than simmering the torn paper in a pan, require litre sized bowls, one per recycled papers
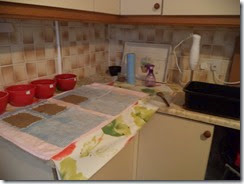
Showing the vat, hand blender cloths and some papers drying as in Methods A and B, and red bowls used in Method B
Method
- Place torn paper in a bowl
- Cover with water, half boiled water plus half cold water and leave overnight
- Then follow Method A from 2 to the end
Section 2: Selection of samples: Plain paper & Interesting effects
The paper samples are numbered 1 to 9 as indicated in Section 1 above
Plain paper Embedding Laminating Fringing Embossing Coloured pulps Plain Paper
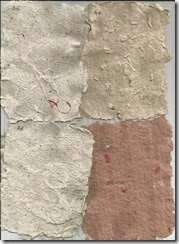
The plain papers are made allowing the pulp to dry naturally
The last one is made from leeks, very fragile. Later, in ‘coloured pulps’, I mixed the leek pulp then laid over another paper pulp sheet to give it more strength. Particularly like the mottled effect in 3 made from the covers of music scores and 6 where there are glimpses of red and gold from the patterned brown paper.
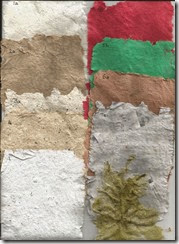
Embedding
This is where the pulp is laid on a textured surface, such as scrim which then attaches to the pulp. The samples shown include scrim, fine hessian, rug canvas, and bits with a musical theme. The rug canvas shows paper with bits of leek pulp also trapped
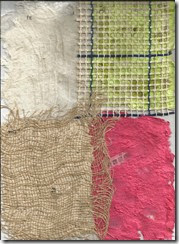
Laminating
This is where bits are trapped between two layers of paper. The samples shown include trapped red threads, green fibres, sequins and bugle beads, and lace. Texture is clear on 4e, possibly a fine, larger lace would show up more in the sample from paper 6.
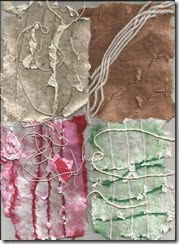
Fringing
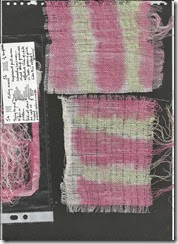
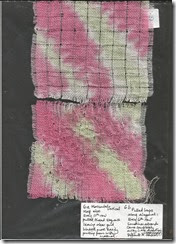
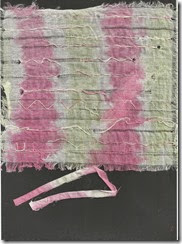
I really like the textured effect in this method. Perle threads work well, wool sometimes fringes but in this sample some of the wool just slid out. Fringing is where lengths of thread are sandwiched between two layers of pulp paper while still wet. The top layer can be finer paper than the bottom layer. Just before the paper is totally dry tear the threads out. Threads and paper bits can be kept, to add later as layers. I like the idea of having a lighter colour on top, so the other colour shows through. In the green sample horizontal threads were removed, vertical threads were left (laminated).
Embossing
This is where the paper pulp sheet is laid on top of textured surfaces, removed when dry. Net and meshes come away easier than some items leaving textured paper, on both sides. These samples included a plastic net, cheese grater, wide spaced material net ad rug canvas. It was really difficult, removing the dry paper from the cheese grater, but worth the small sample that could be added to work.
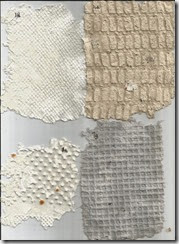
Some samples were attempted where larger shapes were placed under the kitchen roll, such as chains, knife and fork, but none worked. The kitchen roll did not mould around the shapes, so neither did the paper pulp sheets.
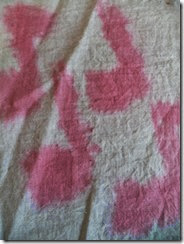
Bits including plastic templates of letters can be pressed on to the wet paper pulp, removed when dry leaving an imprint. In these samples I used the Welsh ‘Cerddol’ which in English means ‘musical’.
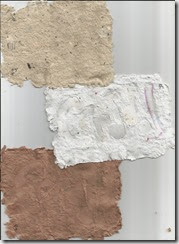
The top sample has a very fine imprint, where fine wire was bent into script for the same word. Each could be used to form a water mark.
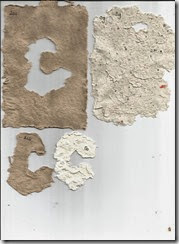
These samples show different ways of making letters separately, using a cut mesh template in the shape of the letter either dipped into the pulp and removed or placed on the main mesh and removed afterwards, left to dry separately and the final one (top right) was using a stencil with the word ‘Cerddol’ cut out, laid on top of the mesh in the pulp, brought out together, then removing the top layer when drier. Each sort of worked but could do better! To ensure the stencil or templates do move off the mesh could have sewn it on to the mesh.
Coloured pulps
This is where colour is used in making the paper. I used four methods:
- ready coloured paper
- Brusho dyes to colour the wet paper
- cold water dyes
- natural plant fibres
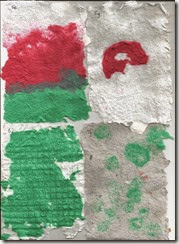
Ready coloured papers were use in the first method (not recycled). Red and green were chosen relating to the colours in the Welsh flag. These samples show: first, three smaller amounts (partly covering mesh) laid next to each other and overlapping (like the flag, but no dragon!); the next was an embossed piece on rug canvas, two layers one white with a bit of green on top; the next a blob from gathering remnants of the red pulp in a small sieve then knocking it on to a white background; and the final sample, blobs of green dropped on to the lighter background.
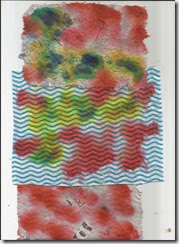
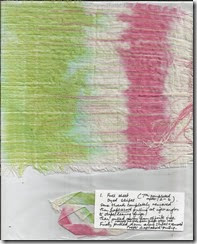
Brusho dye powders have been sprinkled on to these samples whilst the paper was still wet. Left to dry naturally and allowed the colours to spread. Red vermilliom, Blue, and Gamboge yellow. If only I had a plainer cloth under the samples, as the lower cloth also absorbed the dyes and could be used. I did not have green so tried to mix blue and yellow, with only a degree of success. With another piece used turquoise instead of blue which was more successful.
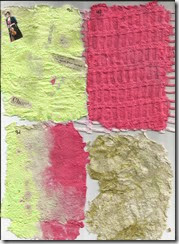
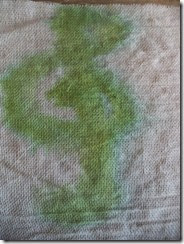
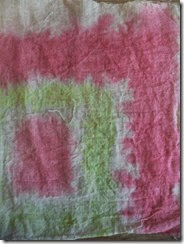
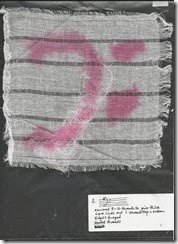
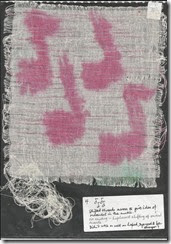
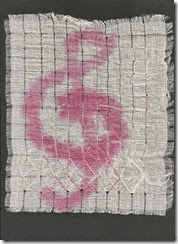
Cold water dyes were used in these samples – Rainforest Green and Tulip Red Dylon dyes mixed according to the packets and as in Module 3 Chapter 3. The instructions are also covered in Chapter 5 of this module for colouring fabric for the drawn thread work. These samples were made at the same time as the fabrics. The paper pulp used was made from the old sleeves from inside record covers, mixed into each vat of dye. First is green with embedded musical paper bits and embossed guitar plectrums and a plastic treble clef; the second smaller dyed bits laid side by side; the third pulp laid and embedded on large net; the final piece mixed leek and paper pulp using natural plant fibres for the green. The green dye was not a very strong colour, maybe next time I will provide more concentrated dye mix and/or add salt to the dye bath.
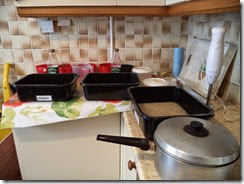
This shows materials ready to use including dye baths, soda and salt mixes, paper pulp vat, pan from which pulp whisked, and hand blender.
I now have a lovely collection of papers which ideally I’d like to keep as a record, so I can see myself making more paper for later work and why not, enjoyed it.
