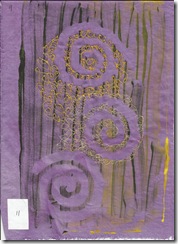
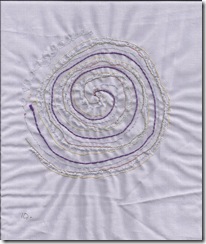
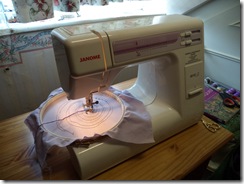
Wednesday 11 December 2013

Chapter 8 Beads

This chapter shows the different types of beads that can be used in embroidery.  Complementary colours of purple and yellow were selected.

A special bead needle is used where beads have very small holes.  It is useful to also use special bead thread which is waxed using special beading wax.  I used the bead needle in most instances with a crewel needle where beads were larger.  I found using fine threads it was not always necessary to wax the thread.

  1. Selection of beads
  2. Sampler showing methods of application
  3. Samples showing different edgings
  4. Trapped beads (see Section 2)

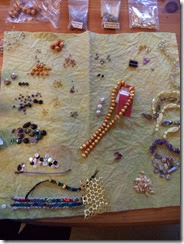
1.  Selection of beads

088

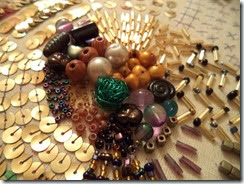
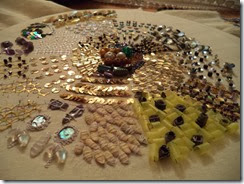
In clockwise direction from top left are:

Rocaille or seed beads

Bugle beads

Pearl beads

Shi sha:  seeds and shells

Pailettes or sequins and sequin waste

2.  Sampler showing methods of application

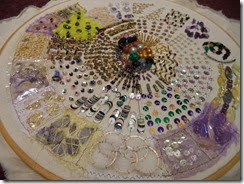
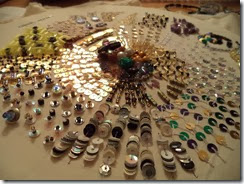
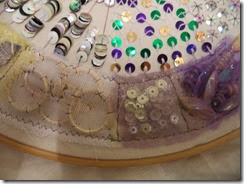
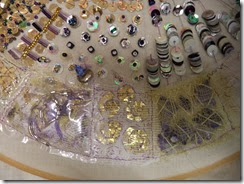
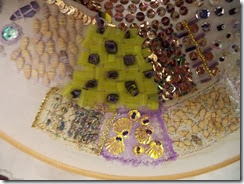
Based on the spiral theme I chose a sampler arranged as a spiral.  I used a large embroidery hoop, 30 cm diameter.

The background fabric is calico backed with muslin for strength not dyed so that the colour from the beads could be clearly seen.

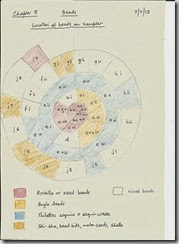
To identify the beads and application techniques I drew a chart with accompanying spreadsheet (the chart shows lower case letters with roman numerals, whereas the spreadsheet gives equivalent coding using capital letter with numbers)

007

 Distant Stitch Cert3 M3 Ch8 001 

Sampler of bead types and different methods of application
Ref Needlework School pp 124-125

Used beading needle where fine beads and fine thread, crewel needle used otherwise
N B Lower case letters replaced with capitals

Roman numerals with numbers

Area
Bead type
Method of application
Comments

A 1
Rocaille or seed beads
One stitch, individually
Made bead rolling metal wire

A 2
Rocaille 2 pearl beads
One stitch, individually
Worked mostly right to left when attaching A beads

A 3
Rocaille 3 wooden beads
One stitch, individually
Most beads in A were stitched taking needle down

A 4
Rocaille 4 wood glass beads
One stitch, individually
through the same hole as came up

A 5
Rocaille 4 freshwater pearls
One stitch, individually

A 6
Rocaille 6 metallic glass beads
One stitch, individually
See also B 1

A 7
Rocaille several coloured beads
One stitch, individually
Scattered haphazardly

A 8
Rocaille several dark topaz
One stitch, individually
Scattered with spaces

A 9
Rocaille golden yellow glass beads
One stitch, individually
Scattered more widely spaced

A 10
Rocaille tiny variegated beads
One stitch, individually
Close together

101

B 1
Mixed shapes
One stitch, individually
The larger shapes make the stitch longer

C 1
Bugle beads
One stitch, individually
Fanned lines

C 2
Bugle beads
One stitch, individually
Scattered haphazardly

C 3
Bugle beads and another
One stitch, individually
Zig zag pattern following spiral

C 4
Bugle beads
Varying length strings
In ones, threes and fours, fanned lines

C 5
Two stitch, individually
To keep holes uppermost on single beads


D 1
Rocaille Mixed shapes and colours
Varying length strings
Fanned lines

E 1
Pailettes or sequins
Single back stitch
Fanned lines, sequins touching

E 2
Pailettes or sequins
Two stitch back stitch
Following spiral

E 3
Pailettes or sequins
One stitch, individually
Invisible sequin stitch, in rows

E 4
Pailettes or sequins
Three thread tripod
Used fly stitch

E 5
Pailettes or sequins
Four thread
Square sequins, close and random

E 6
Pailettes or sequins
Six thread
Hexagonal sequins, scattered mixed concave and convex

E 7
Pailettes or sequins
Decorative embroidery stitch
Round sequins Fly and chain stitch

E 8
Pailettes or sequins
Long thread varying lengths
Variety of sequins in fanned lines using long stitch.

Love the moement as beads slide along

100

E 9
Mixed beads stacked
Rocaille beads on top
Good variety of texture

Single or gathered back through initial hole

F 1
Variety of beads
Compact area, different stitches
Parallel lines in a pattern

F 2
Variety of beads
Compact area, one stitch
Sequins close together, interspersed with tiny beads

Complementary colours in design

F 3
Variety of beads
One and two stitch, individually
Pattern of made beads, straws and rolled. Deeper texture

G 1
Shi sha – melon seeds
Three thread spiral wrap
Seeds have a mind of their own Needed extra chiffon cover

to hold in place. Laid out in spiral but not very clear

G 2
Shi sha – beads and shells no holes
Variety of techniques
Basic Shi sha frame for shells

G 3
Sequin waste
Three and Four thread
Like the haphazard effect using metallic variegated thread to attach

the sequin waste

G 4
Sequin waste
Two thread zig zag stitch
At each corner attached a bead which provides a pattern centred on

some of the holes and attaches the sequin waste

099

H 1
Roughly cut semi precious beads
Couched threads of beads
Used two threads and two needles, the second couching the thread

in a snake-like spiral pattern

H 2
Pailettes or sequins ready made strings
Couched threads of beads
Used one needle with hidden thread, arranged in spiral patterns

H 3
Mixed beads on a string with no holes
Couched threads of beads
Tried to vary the couching mixing location of couch and stitch using

three different arrangements

J 1
Mixed beads cut from string
Trapped beads with chiffon
Running stitch between the beads to help keep in place

J 2
Pailettes or sequins
Trapped beads with organza
Lovely glittery raised surface

J 3
Hoops
Trapped beads with muslin
Pattern generated by stitching around each hoop through the cover

003

J 4
Shi sha – shells no holes
Trapped beads with dyed scrim
Held in place using varied size in fly stitch

J 5
Shi sha – spirals cut from tomato puree tube
Trapped beads with net
To space used running stitch to follow spirals, made extra in spaces

H & S puree tube can be sharp once cut, the net gives some protection

J 6
Pailettes or sequins
Trapped thread bits with plastic
Useful way of using complementary coloured bits of thread.

Added a couched spiral of beads for extra texture

004

J 7
Shi sha – melon seeds
Trapped beads with net
Cross stitch in variegated metallic thread used to attach the seeds.

Running stitch between the beads. Kept in place better than G 1

J 8
Pailettes or sequins – shells with holes
Trapped beads with dyed scrim
Fancy bead help place the sequins. Zig zag used to attach scrim

works as well as back stitch

J 9
Rocaille or seed beads
Trapped beads with ribbon
Zig zag lines separated some of the beads, clustered in different

quantities. Glittery and decorative

005

Hand stitching was used throughout, although could have used machine stitching especially to attach fabrics trapping beads.

Made the pockets before adding the beads. Machining would have meant removing the sampler and turning it over so I could stitch into the fabric.

Decided it was easier to use hand stitching. In other layouts may be easier to rearrange the fabric for the machine.

3.  Samples showing different edgings

The next illustration shows different ways of edging with beads

Edging 001

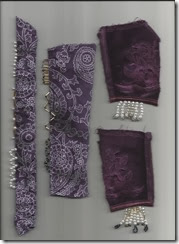
The first strip shows (from top to bottom): rocaille beads individually along a seam; close together then spaced using a bugle bead and the third as small strings of five beads ( the last gives a spiral effect as each strand has been sewn from back to front onto the seam, rather than just stitching along the seam)

The second strip shows (from top to bottom): individual bugle beads separated with a seed bead, each is stitched on to the seam returning through the previous bugle bead repeating along the length of the seam; similar sequence but giving a zig zag arrangement (not returning through the bugle bead); the third a varied colour of beads showing the effect of stitching along the seam

The top right and bottom right samples show fringes where the bead needle returns through each strand except for last bead to attach to the seam.  The bottom right example shows how a pattern can be developed by rearranging the sequence of beads.  At the end of each string is a single or loop of beads.


It was a helpful exercise and I feel I have learnt a lot about different beads and manipulating them.  The sampler will remain a useful guide to the different beads and their applications
Saturday 26 October 2013

Chapter 7 Simple button making

This chapter contains a selection of buttons using different cores, techniques and complementary colours of purple and yellow, in hand dyed or commercial fabrics, threads, wires and beads.

There are series of samples

  1. Basic core shapes
  2. Hoop cores
  3. 3-D solid cores
  4. Dorset buttons
  5. Bottle top cores
  6. Toggle buttons

The notebook contains techniques and materials used for each button with Health & Safety rules.

1.  Basic core shapes


Distant Stitch Cert3 M3 Ch7 Page 1

Distant Stitch Cert3 M3 Ch7 052

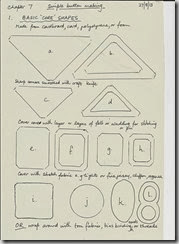
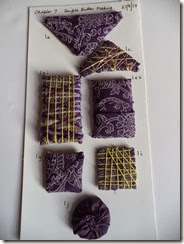
Commercial fabric was used to add a consistency to the background, varying the design shape and size.  Each was wrapped with a first layer of wadding to soften the feel and add depth to the button.

No hollowed examples were made except for hoop cores (See 2 below). It can be more difficult to wrap fabrics and threads through the shapes and around corners, cutting off a bit of each corner helps.  They could be used as buckles, brooches or pendants.  Some of the techniques used on the hoops could be applied to hollowed shapes.

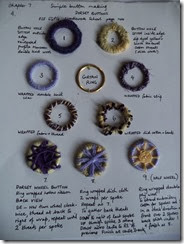
2.  Hooped cores 

Distant Stitch Cert3 M3 Ch7 053

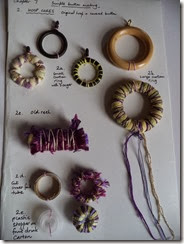
There are many items that could be used to make these buttons, here are just a few.

I like the combination of colours and tried to use different textures of threads and torn yarns, including some hand dyed materials.

Some can be hung on bags, clothing or used separately as jewellery, with or without extra hoop to hang.

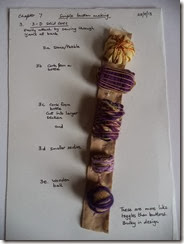
3.  3-D solid cores

Distant Stitch Cert3 M3 Ch7 054

Exposed cores of cork or wood might be useful to relate to the musical instrument theme.

I like 3d as it is more delicate and for the combination of commercial and hand-dyed threads.

4.  Dorset buttons

Distant Stitch Cert3 M3 Ch7 055

I like this technique and can see with a variation in threads or torn yarns quite a variety might be made.  5, 6 and 9 show several spiral applications.  These buttons could be added to a number of accessories.

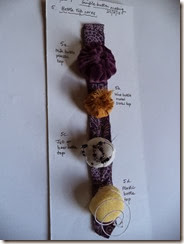
5.  Bottle top cores

Distant Stitch Cert3 M3 Ch7 059

I had quite a lot of fun with these.  Each were initially padded. Circles of stretchy or soft fabrics were used, gathering a circle of running stitch near the edge of the circle of fabric.

The first two were left with fabric only, attaching the button to expose the spiral effect of the gathered fabric.

The other two were embellished with wire and beads or left with the wire showing its spiral effect.  (It was important not to have sharp points exposed). They were attached with stitch using the gathered fabric side.  I noticed that attaching using the flatter surface made it easier to hold the button in a particular position, the second two had minds of their own!

What a wonderful way for reusing all those bottle tops, hoops and card tubes.  Aluminium foil and cling film rolls are especially solid and a good size to cut up.

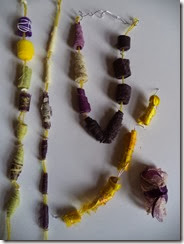
6.  Toggle buttons 

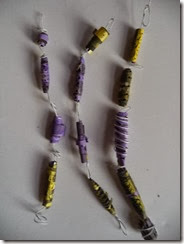
I displayed these samples on woollen threads or wire, showing that the buttons can be a string or single and act as buttons or beads.

Distant Stitch Cert3 M3 Ch7 061 Distant Stitch Cert3 M3 Ch7 062  

Left hand samples

The strands from left to right were made of different fabrics: felt, with or without a layer of Lutrador; layers of Lutrador; leather or suede; cut up silk rod and on its own a hand-dyed silk cocoon wrapped with hand dyed silk string and tied with a ribbon.

Each were varying cuts of triangular material, rolled into a button (or bead), attached with PVA glue, and/or wire.

Some buttons were wrapped with wires spiralling around the button.

Right hand samples

These were made of hand painted Tyvek, one side of the Tyvek in shades of yellow, the other side in shades of purple.

The buttons were cut with designs using a soldering iron, especially for use in embroidery work.

I have noticed that I have not used metallic thread with the buttons or used a heat gun.  I can imagine the latter producing a bubbled or concave effect dependent on which side of the Tyvek is uppermost.

With most of the toggle buttons I was able to use spirals not only on the buttons but also to join some of them together.

It is very important to use caution with the soldering iron and heat gun and Health and Safety rules are provided in my notes.

As well as the button samples above I also have commercial buttons in the chosen colours and some hand dyed (Chapter 3).

Wednesday 9 October 2013

Chapter 6 Simple tassels

This chapter contains simple tassel making techniques, using the complementary colours purple and yellow threads and torn fabrics

Hand made tassels

Machine made tassels

Hand made tassels

The following method was used to make tassels with a head, neck(s) and skirt(s):

Card 10cm x 20cm

Threads and yarn wrapped several times around the card

A thread or cord was pulled through and fastened at the top of the card

The threads or yarns were eased off the card

Thread or yarn was wrapped around to form one or more necks

The bottom of the skirt was cut through the loops (however loops could remain in place)

The tassels were either all in one colour or with a mixture of colours and textures

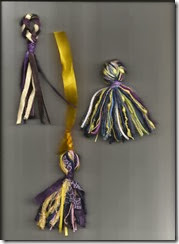
Illustrations show different techniques:
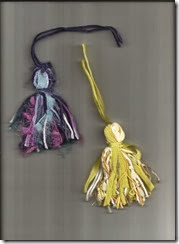
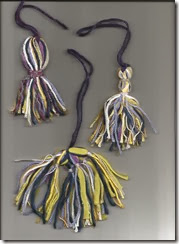
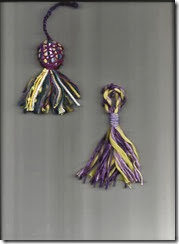
A1 to A2 variations of one colour
B1 to B3 used a mixture of complementary colours, varying the location of the neck(s)

C1 had a padded head covered with detached buttonhole stitch

D1 was a tassel made from twisted cord, releasing the twist to form the skirt

E1 was a tassel made from a plait, releasing the plait to form the skirt, using leather, suede and velvet

F1 was made using a longer card (A4 book) knotted in half to form the head, folded in half, torn ribbon wrapped around for the neck, the skirt from free yarns

G1 was made from a mix of threads and torn yarn strips and ribbon

A1 to A2

Simple tassels A1 and A2  

B1 to B3

Simple tassels B1 to B3 001

C1 and D1

Simple tassels C1 and D1 001

E1 to G1

Simple tassels E1 to G1 001

Most of these tassels are quite bulky hopefully showing the technique used.

They might be used on bags, curtains, wall hangings or hanging from musical instrument cords

Finer tassels could be achieved using finer threads for jewellery, belts, or smaller gentler features on bags

Each tassel could be used alone or as a collection

I particularly like E1 to G1, C1 needs more practice using detached button hole but I like this as an addition.

Machine made tassels

The following method was used to make tassels with a head, neck(s) and skirt(s), using metallic threads:

Picture frames as a frame in metal or bamboo (not too deep so can go under the needle)

Threads and yarn wrapped several times around the frame

The machine was set for free machine embroidery: zigzag length O, width 6 or running stitch length 3, width 0

The head was stitched along the centre section within the frame

The threads or yarns were eased off or cut from the frame

Thread were wrapped around to form the neck below the stitched head

The bottom of the skirt was cut through the loops (however loops could remain in place)

The tassels were mostly made using Madeira metallic threads in various gold colours

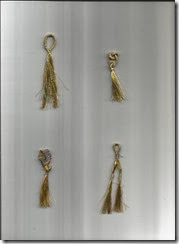
Illustrations show different techniques:
Sample 1 Using zigzag stitch along the centre section of the threads to form the head

Sample 2 Longer length of zigzag stitch to allow a double knot to form the head

Sample 3 Using running stitch across the threads to make a short length of braid to form the head (a wider wrap of threads helped with this)

Sample 4 Using zigzag stitch along the centre to form the head, with extra lengths either side to make necks at the top of two tassels

Simple tassels Machined 1 to 4 001 

With Sample 3 I added variegated purple cotton thread in the lower spool for contrast, but maybe metallic thread would run better, as the stitching was more problematical.  Overall I found this a quick and smooth way to make tassels.  The effect was a more delicate form.  I was amazed how manipulative the heavily stitched areas were to make shapes.

I like all four samples, but particularly the knotted head in Sample 2, with its Celtic design.

Tassels are an ideal addition to create movement in work.

Tuesday 24 September 2013

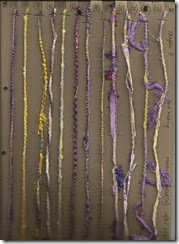
Chapter 5 Cord making

This chapter contains machine and hand made cords and the threads and yarn lengths used in each sample were noted in my notebook
A. Machine stitched cords
B. Twisted cords
C. Knotted, plaited and wrapped methods
A. Machine stitched cords
Prepared the machine for free machine embroidery.
Set zigzag on pattern with width 4 – 6 and length 0
Used variegated purple thread in the bobbin and variegated yellow thread in the top needle.
And used plastic drinking straw to feed multiple threads and yarns together using approx. 50 cm lengths
DSC00934
DSC00935 
Some cords are narrow and tight, others more haphazard with fringes and loops added.
Particularly like M9 (see labelling on card below) with its loose bits and different spread of zigzags along the length of the cord.  Some wanted to twist into shapes ideal for the project (M3 and M13)
Distant Stitch Cert3 M3 Ch5
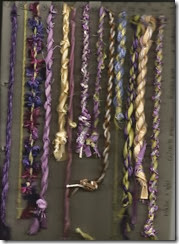
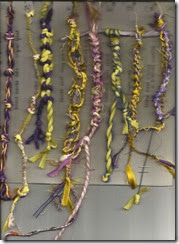
B Twisted cords
This was a manual method where often samples became shorter than in A, initially using two lengths of thread or yarn, tied together one end held in place using the top spool holder the other end twisted using a pencil.  The cord was tightly twisted, brought the ends together, holding middle, then released to form varying thicknesses and twists of cord.  The ends were then fastened off to keep cord in tact.
Used 60cm and sometimes longer lengths:
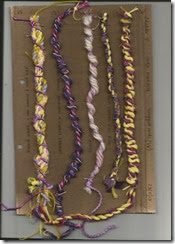
Distant Stitch Cert3 M3 Ch5 001 
Pleased with the amazing variety of cords.
Liked the fringed effect of T3, the clear twists of the leather and string of T9 and chunkiness of using yarns, threads and strips of suede of T13.
It is difficult to judge the length of threads or yarns needed for a particular length of cord, but it is a quick technique and easy to repeat.
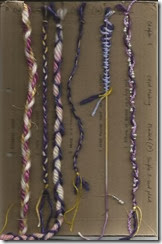
C. Knotted, plaited and wrapped methods
Separate samples were made for each of these techniques
Knotted cords
I started off wrong with this technique, initially just knotting lengths of thread or yarn, then realised that more was required.  I have a couple of the mistakes filed, but here is a card showing 8 techniques:
K1 Simple knotted cord regular spaced; K2 irregular spaced; K3 Series of half hitch knots; K4 Square knot using same side; K5 Square knot using alternate sides; K6 Continuous twist chain; K7 Finger cord; K8 Double ridge hitching or alternate chaining
Distant Stitch Cert3 M3 Ch5 003
I used different types of thread and yarn including fine metal, and different numbers of strands.  It was interesting to find the cord twisted forming a spiral effect when using the same side (K4 and K8), but became flatter using alternate sides (K5), with a distinction possibly between a cord and a braid.
Plaited cords
I was used to making plaits in hair as a child and found it easy using three strands from the back of the plait.
However I soon realised that I needed to adopt a different technique when using four or more strands, and indeed equally for three strands, using a similar approach for each.  I used a sponge base to hold pins in place at the top or start of the plait.  The pins held each strand in place, then using an over and under approach for the left thread to the right in a consistent way was able to make different designs in the plait.  (This I recorded in my notes, taking some photographs to show each stage).
Because cords were required to make these plaits, I used existing cords as in string and wool as well as further machine made or twisted examples.
Here are a series of simple three cord plaits:
Distant Stitch Cert3 M3 Ch5 004
Followed by a series of multiple cord braids:
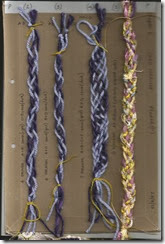
Distant Stitch Cert3 M3 Ch5 005
It was very satisfying finding a consistent approach to the plaiting technique; the variety of designs both in the cords and particularly the braids. The braid designs could be made into bracelets, bands or belts.
Another technique that  I decided to try was to use a lucet to make very strong cords.  I believe it was used in Medieval times.  I made some out of cotton thread (like wool) and raffia using variegated yellow or purple, and one colour yellow and purple, some using one thread others using two threads.  Gave good results.
Didn’t do so well with the Turk’s Head knot.  I was able to make a flat version but not a button or toggle.  I wondered whether a Monkey’s paw would produce a better button.  I need to practice both techniques as I can see how it can be used in a variety of ways, from the Scout’s toggle, rings and bracelets as well as attractive buttons and heads for tassels.
Wrapped method
For this method I made a lot more twisted cords.
I used one cord or a group of cords for the main core and another cord or group of cords for wrapping.  I enjoyed making the five samples.
W1 Single wrap: 1 cord around a 3 cord core; W2 Wrapped loosely and unevenly, twisted cord around a one string core; W3 Single cord wrapped tightly around a soft fat core; W4 Thick cord wrapped with fine thread; W5 Fine cord core wrapped with thicker cord
Distant Stitch Cert3 M3 Ch5 006
I liked all these techniques and I can see them being laid around a hat or bag.
It was a satisfying experience using these techniques and hope to use some in my final item.
Health & Safety was noted in the notebook.

Monday 19 August 2013

Chapter 4 Decorate with stitchery

This chapter is divided into two sections
Section A. Hand stitchery

Section B. Machine Stitchery

Here are presented the samples, with just a note to accompany each.

Most of the work was stitched into hand dyed fabrics, but some samples especially in Section B included plain calico or commercial coloured fabrics, when experimenting with stitch techniques.
Health & Safety, techniques, stitches, fabrics and threads used were listed in my file.

Section A. Hand stitchery

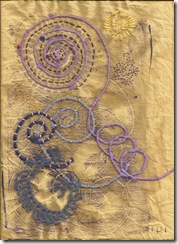
H 1 A sampler showing hand dyed yellow cotton with darker purple mono-print, large spiral with several rows from central point,tiny continuous spirals, yellow or purple, series of overlapping spirals in shades of wool couched indicating background, middle and fore-ground, medium yellow spiral, all producing a spiralling network.

Helped by the mono-printing was pleased by the depth and movement in this piece.  Like the idea of keeping some of the mono-printing free of stitch, but could add more to it (possibly machine stitchery).

Distant Stitch Cert 3 M3 Ch4 

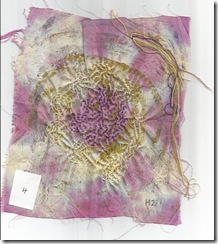
H 2 Using Sample 4 of the mono-prints Series of spirals in purple and different shades of yellow.

Particularly like the texture from gathering the running stitches, and the patterns from the spirals being close together.  Feel this would be ideal for making buttons.

Distant Stitch Cert 3 M3 Ch4 001

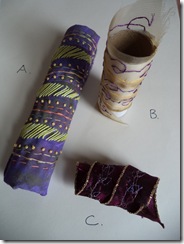
H 3 Commercially random dyed purple and yellow cotton showing back stitch, running stitch, wide stem stitch and french knots, which I then wrapped around a cardboard core.  Inspired by the column on a harp.  (Shown as A).  When flat the pattern was depicting a spiral column in 2-D, but by wrapping around the card prefer the 3-D effect.

DSC00924

H 4 Stitched ribbon Back stitched continuous spirals along ribbon ( Shown as B)

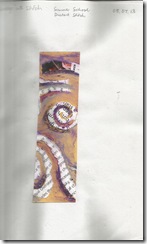
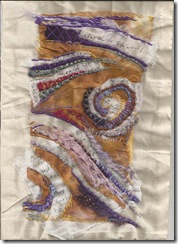
Another sample: At the Summer school (Sue Dove’s workshop) using music as inspiration from part of a larger piece with text and oil pastels on orange card, I then enlarged and depicted the piece in stitch.  The dyed fabric was wet wipes used to clean off paint.  It was great trying to generate the original paper version into stitch, using different threads and stitches.  The text was duplicated using a felt tip pen on muslin from musical quotes.  The result I feel has earthy almost aboriginal elements.

The card was 5cm x 18 cm.  The finished piece 14 cm x 26 cm on calico

Distant Stitch Summer School

Distant Stitch Summer School 001

Section B. Machine Stitchery

The machine was set up for free machine embroidery as outlined in my file.        Initially I worked without a hoop as seen in the first three samples, but found it more effective using a hoop

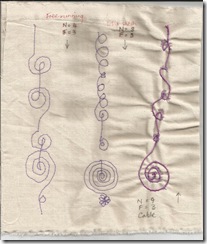
The samples in this section include free running stitch, whip stitch, cable stitch and zigzag stitch.

The first on calico shows the three main stitches, without a hoop

Distant Stitch Cert 3 M3 Ch4 002

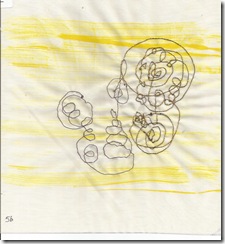
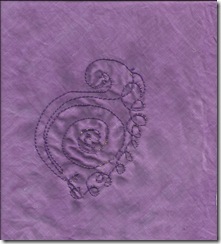
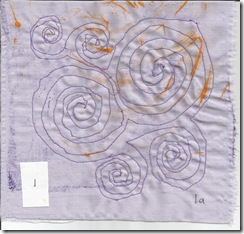
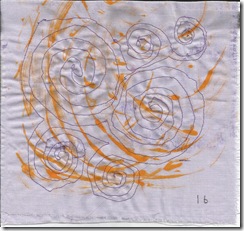
Samples 1a and 1b on purple cotton with mono-print 1, show upper side and reverse of continual spirals, free running stitch (18cm x 18cm)

Distant Stitch Cert 3 M3 Ch4 003Distant Stitch Cert 3 M3 Ch4 004 

Samples 2a and 2b on calico show two threads in the needle, 2a without a hoop, 2b with a hoop (18cm x 18cm each)

Distant Stitch Cert 3 M3 Ch4 005

Sample 3 on calico, same thread as 2, with a hoop (18cm x 18 cm).                                 To ensure the fabric is taut in the hoop need to use a larger size piece of fabric.     However this is quite a lively piece showing different spirals.

Distant Stitch Cert 3 M3 Ch4 006

Sample 4 on calico, with a hoop showing whip stitch.  I hoped the variegated purple thread in the bobbin would have shown up better.  Whip stitch was achieved but this is rather a subtle coloured piece (18cm x 18 cm)

Distant Stitch Cert 3 M3 Ch4 007

Samples 5a and 5b Whip stitch which came out as cable stitch.  Top and reverse of the piece are shown here (25cm x 25cm) Design smaller, moving the hoop to fit.

Distant Stitch Cert 3 M3 Ch4 008Distant Stitch Cert 3 M3 Ch4 009 

Sample 6 on linen Cable stitch (25cm x 25 cm)  Looks like a shell or snail!

Distant Stitch Cert 3 M3 Ch4 011 

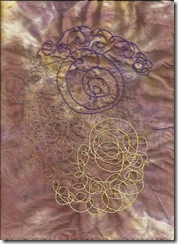
Sample 7 on random dyed fabric shows a variety of stitches and mixed threads.  Plenty of overlapping giving movement and depth to the piece (20cm x 26cm).  Like this the best so far!

Distant Stitch Cert 3 M3 Ch4 012

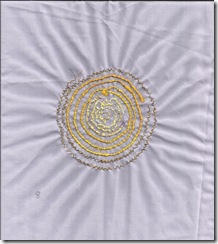
Sample 8 on cotton Mostly cable stitch and zigzag with different threads.  This continuing spiral could grow or be left this size.  Worked area has a diameter of 10cm.  Interesting gathered effect.

Distant Stitch Cert 3 M3 Ch4 013

Sample 9 on purple dyed cotton with mono-print 11.  Used whip stitch, continuous small spirals in complementary colours to infill the negative space from the masks.  Feel this was effective.  (28cm x 20cm)  Later photographed a piece of chiffon with the same mono-print overlaying this sample to give another dimension.

Distant Stitch Cert 3 M3 Ch4 014

Sample 10 on purple poly cotton.  This was made up with a series of different stitches each row starting at the same central position, finishing with a sequence of spirals.  Used running stitch, running stitch with two needle threads, whip stitch, cable stitch and zigzag stitch and complementary colours. (Diameter of 15cm)

Distant Stitch Cert 3 M3 Ch4 015

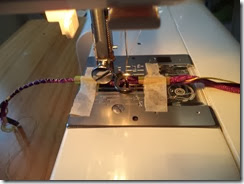
Finally I tried to machine stitch some ribbon, the sort that has fine wire structure in order to give a 3-D effect (See C on the final hand stitched sample)

This next photograph shows the machine set up, working on Sample 10

DSC00922

I am conscious that I have not combined hand and machine stitching, but appreciate that this would give another dimension to the work.