Saturday 26 October 2013

Chapter 7 Simple button making

This chapter contains a selection of buttons using different cores, techniques and complementary colours of purple and yellow, in hand dyed or commercial fabrics, threads, wires and beads.

There are series of samples

  1. Basic core shapes
  2. Hoop cores
  3. 3-D solid cores
  4. Dorset buttons
  5. Bottle top cores
  6. Toggle buttons

The notebook contains techniques and materials used for each button with Health & Safety rules.

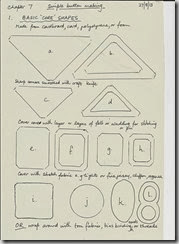
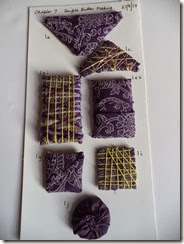
1.  Basic core shapes


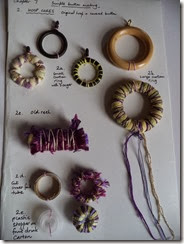
Distant Stitch Cert3 M3 Ch7 Page 1

Distant Stitch Cert3 M3 Ch7 052

Commercial fabric was used to add a consistency to the background, varying the design shape and size.  Each was wrapped with a first layer of wadding to soften the feel and add depth to the button.

No hollowed examples were made except for hoop cores (See 2 below). It can be more difficult to wrap fabrics and threads through the shapes and around corners, cutting off a bit of each corner helps.  They could be used as buckles, brooches or pendants.  Some of the techniques used on the hoops could be applied to hollowed shapes.

2.  Hooped cores 

Distant Stitch Cert3 M3 Ch7 053

There are many items that could be used to make these buttons, here are just a few.

I like the combination of colours and tried to use different textures of threads and torn yarns, including some hand dyed materials.

Some can be hung on bags, clothing or used separately as jewellery, with or without extra hoop to hang.

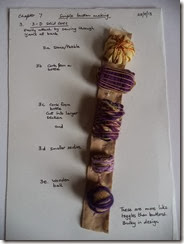
3.  3-D solid cores

Distant Stitch Cert3 M3 Ch7 054

Exposed cores of cork or wood might be useful to relate to the musical instrument theme.

I like 3d as it is more delicate and for the combination of commercial and hand-dyed threads.

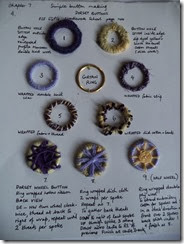
4.  Dorset buttons

Distant Stitch Cert3 M3 Ch7 055

I like this technique and can see with a variation in threads or torn yarns quite a variety might be made.  5, 6 and 9 show several spiral applications.  These buttons could be added to a number of accessories.

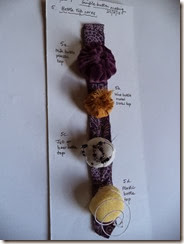
5.  Bottle top cores

Distant Stitch Cert3 M3 Ch7 059

I had quite a lot of fun with these.  Each were initially padded. Circles of stretchy or soft fabrics were used, gathering a circle of running stitch near the edge of the circle of fabric.

The first two were left with fabric only, attaching the button to expose the spiral effect of the gathered fabric.

The other two were embellished with wire and beads or left with the wire showing its spiral effect.  (It was important not to have sharp points exposed). They were attached with stitch using the gathered fabric side.  I noticed that attaching using the flatter surface made it easier to hold the button in a particular position, the second two had minds of their own!

What a wonderful way for reusing all those bottle tops, hoops and card tubes.  Aluminium foil and cling film rolls are especially solid and a good size to cut up.

6.  Toggle buttons 

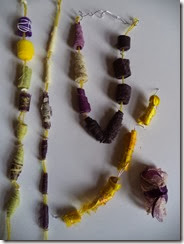
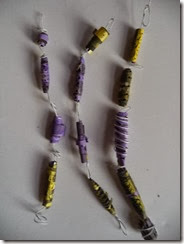
I displayed these samples on woollen threads or wire, showing that the buttons can be a string or single and act as buttons or beads.

Distant Stitch Cert3 M3 Ch7 061 Distant Stitch Cert3 M3 Ch7 062  

Left hand samples

The strands from left to right were made of different fabrics: felt, with or without a layer of Lutrador; layers of Lutrador; leather or suede; cut up silk rod and on its own a hand-dyed silk cocoon wrapped with hand dyed silk string and tied with a ribbon.

Each were varying cuts of triangular material, rolled into a button (or bead), attached with PVA glue, and/or wire.

Some buttons were wrapped with wires spiralling around the button.

Right hand samples

These were made of hand painted Tyvek, one side of the Tyvek in shades of yellow, the other side in shades of purple.

The buttons were cut with designs using a soldering iron, especially for use in embroidery work.

I have noticed that I have not used metallic thread with the buttons or used a heat gun.  I can imagine the latter producing a bubbled or concave effect dependent on which side of the Tyvek is uppermost.

With most of the toggle buttons I was able to use spirals not only on the buttons but also to join some of them together.

It is very important to use caution with the soldering iron and heat gun and Health and Safety rules are provided in my notes.

As well as the button samples above I also have commercial buttons in the chosen colours and some hand dyed (Chapter 3).
Wednesday 9 October 2013

Chapter 6 Simple tassels

This chapter contains simple tassel making techniques, using the complementary colours purple and yellow threads and torn fabrics

Hand made tassels

Machine made tassels

Hand made tassels

The following method was used to make tassels with a head, neck(s) and skirt(s):

Card 10cm x 20cm

Threads and yarn wrapped several times around the card

A thread or cord was pulled through and fastened at the top of the card

The threads or yarns were eased off the card

Thread or yarn was wrapped around to form one or more necks

The bottom of the skirt was cut through the loops (however loops could remain in place)

The tassels were either all in one colour or with a mixture of colours and textures

Illustrations show different techniques:

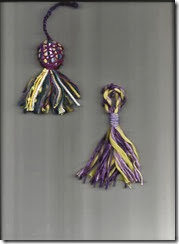
A1 to A2 variations of one colour

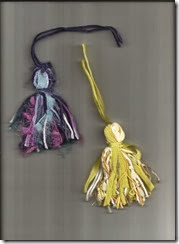
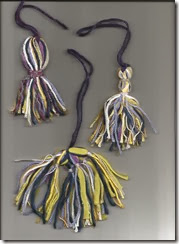
B1 to B3 used a mixture of complementary colours, varying the location of the neck(s)

C1 had a padded head covered with detached buttonhole stitch

D1 was a tassel made from twisted cord, releasing the twist to form the skirt

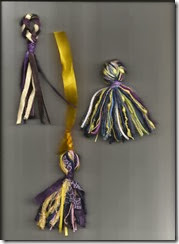
E1 was a tassel made from a plait, releasing the plait to form the skirt, using leather, suede and velvet

F1 was made using a longer card (A4 book) knotted in half to form the head, folded in half, torn ribbon wrapped around for the neck, the skirt from free yarns

G1 was made from a mix of threads and torn yarn strips and ribbon

A1 to A2

Simple tassels A1 and A2  

B1 to B3

Simple tassels B1 to B3 001

C1 and D1

Simple tassels C1 and D1 001

E1 to G1

Simple tassels E1 to G1 001

Most of these tassels are quite bulky hopefully showing the technique used.

They might be used on bags, curtains, wall hangings or hanging from musical instrument cords

Finer tassels could be achieved using finer threads for jewellery, belts, or smaller gentler features on bags

Each tassel could be used alone or as a collection

I particularly like E1 to G1, C1 needs more practice using detached button hole but I like this as an addition.

Machine made tassels

The following method was used to make tassels with a head, neck(s) and skirt(s), using metallic threads:

Picture frames as a frame in metal or bamboo (not too deep so can go under the needle)

Threads and yarn wrapped several times around the frame

The machine was set for free machine embroidery: zigzag length O, width 6 or running stitch length 3, width 0

The head was stitched along the centre section within the frame

The threads or yarns were eased off or cut from the frame

Thread were wrapped around to form the neck below the stitched head

The bottom of the skirt was cut through the loops (however loops could remain in place)

The tassels were mostly made using Madeira metallic threads in various gold colours

Illustrations show different techniques:

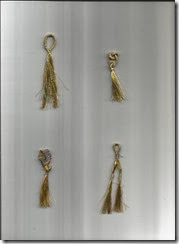
Sample 1 Using zigzag stitch along the centre section of the threads to form the head

Sample 2 Longer length of zigzag stitch to allow a double knot to form the head

Sample 3 Using running stitch across the threads to make a short length of braid to form the head (a wider wrap of threads helped with this)

Sample 4 Using zigzag stitch along the centre to form the head, with extra lengths either side to make necks at the top of two tassels

Simple tassels Machined 1 to 4 001 

With Sample 3 I added variegated purple cotton thread in the lower spool for contrast, but maybe metallic thread would run better, as the stitching was more problematical.  Overall I found this a quick and smooth way to make tassels.  The effect was a more delicate form.  I was amazed how manipulative the heavily stitched areas were to make shapes.

I like all four samples, but particularly the knotted head in Sample 2, with its Celtic design.

Tassels are an ideal addition to create movement in work.