Colwyn Bay has recently seen interesting developments and improvements to the promenade and beach, with sand having been dredged in from sand banks out at sea, the building of a new water sports centre and plans to renovate and develop its Victorian pier. I chose Old Colwyn part of the beach yet unaffected by the changes, which has a lot more variation on the sands with pebbles, rock pools, ripples in the sand and old groynes, rusted railings and interesting steps to access the beach.
I have also researched on the Internet and in books other beaches around the British coastline, but chose to stay local.
In this chapter:
- Colour photographs showing the landscape
- Close up photographs in colour then manipulated on the computer showing
- rock pools
- animal tracks
- vehicle tracks
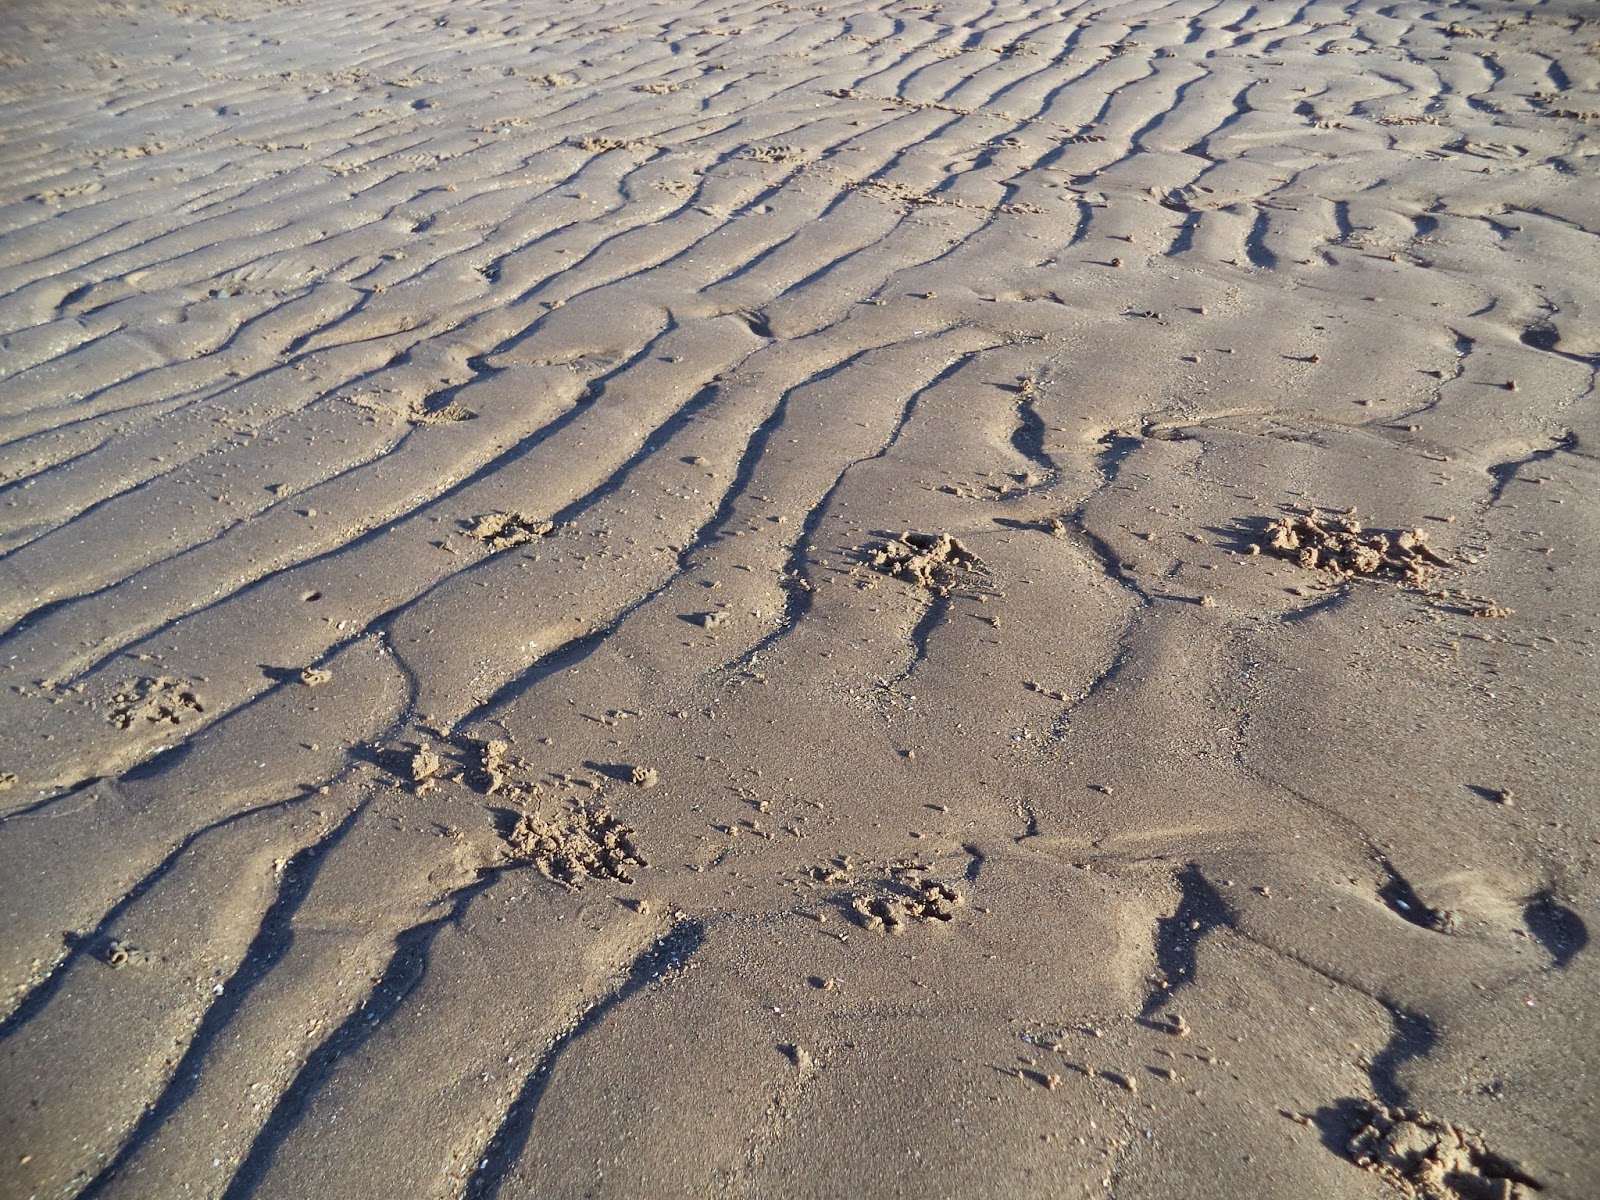
- ripples in the sand
- weathered groynes
- pebbles
- access steps
I took a number of pictures but limited the views for the blog
Insert west view of the beach


2. Close up photographs in colour then manipulated on the computer
Using the Text package, Drawing package and Paint.NET I enjoyed trying out different manipulations. There was usually at least six variations as I converted to black/white or grayscale, cropped and got closer versions of the texture, elongated the picture, inverted or rotated some, set mosaic and poster art examples. I printed copies of these but because text saved images cannot be easily moved to the blog and scans can be unclear, I have selected just one picture alongside the original to high light a technique using Paint.NET package. Unfortunately I cannot find how to crop using this package so sadly examples shown here are not cropped. The last example I particularly like as the picture is in sepia and feel this may be useful inspiration for further monochrome work.
Sample 1 View of a rock pool in original colour, then converted to gray scale and flipped horizontally. The tonal variation in grey scale seemed more effective than black and white in this. Originally using text I printed off six different images
Insert rock pool and manipulated image


Sample 2 View of dog foot prints in the sand in original colour, converted to black & white. I thought the tonal contrast was interesting almost pickiing out individual grains of sand! In text version I printed off six different images the tonal contrast was more effective
There were also boot prints alongside ( No bare footprints because of the weather!) – not shown here
Insert Dog prints and black/white image


Sample 3 View of vehicle tracks in the sand, converted to black & white, cropped, in mosaic style. Really like the textured pattern. The mosaic effect is almost like individual stitches or weave of a fabric. In text I printed off twelve different images, unfortunately the mosaic facility is not available on Paint.NET
Insert Vehicle track

Sample 4 and 5 Views of ripples in the sand, the sun giving interesting long shadows. Sample 4 shows two pictures next to each other (not here but hopefully get the idea), the second flipped vertically, and Sample 5, a close up original photo converted to black & white with ink effect. In text versions I printed off six different images.
Insert two illustrations ripples and two manipulated images. Couldn't get the next two to go alongside one another


Sample 6 Views of the well weathered groynes, full of different texture of the barnacles, wood grain, bolts, seaweeds and sand trapped from the wind, wet and dry areas. The altered image was converted to black & white, pencil effect and polarised effect. In text I printed off eight different images including highlighting grain in wood instead of the barnacles.
Insert two groyne photos and barnacle image


Sample 7 Also of the groynes, went on to use Drawing package, converted to black & white and rotated (not shown here). Have a printed text copy.

Sample 8 Shows just one of many pictures taken of the pebbles. I also collected six small pebbles with their varying sizes, worn to different degrees, sharp edged to smooth rounded examples, showing different texture, patterns and colours. Mixed in with them were shells, small grains of sand, worn glass, bits of seaweed, and sadly some rubbish. I think it would be interesting to crack open some pebbles to see the pattern, colour and texture changes. I printed off three different images, using Drawing package and here is Paint.NET image where I used black & white, inverted , rotated through 90 degrees and used ink effect
Insert Pebbles photo and rotated example


Sample 9 shows a view of the steps providing access to the beach. It was not until I got to this point that I used Paint.NET. It was so much better for manipulating the photographs and it was also possible to save jpeg images of the changed illustrations. I particularly liked this technique and the sepia images.
I took a close up photo of 2 or 3 steps then rotated them, inverted and changed to sepia. It is interesting not only seeing the change in the steps but also the background, beyond the steps.
Insert general view of the steps (looking east wards) and manipulated image of close up photo of the steps


To date I like most of the images chosen, each have their different textures and are reflecting different aspects of the beach landscape, they are set in different locations on the beach. I would like to work further with sepia images but still using black and white in some of the future work, unless recommended otherwise. I am not especially drawn to working with rust but fabrics and threads with brown and natural tones.


