There are different ways to convert a paper design to embroidered techniques to form the wall hanging
Here are brief outlines of 6 possibilities, where I eventually chose the sixth
- Using a log cabin idea: by seaming strips together using a traditional technique or showing off the frayed edges
- Each are a of the design is made separately then in which ever design plan chosen attach the fabric to a stronger backing fabric such as calico
- Translate the design into a woven structure interlacing strips widths cut according to the Fibonacci sequence following the paper design (with several permutations)
- Make the background fabric using stitch and different coloured fabrics considering complementary colours in the arrangement, overlaid with another appropriate made-fabric design
- Each paper shape made into individual pieces of embroidered fabric and stitched together with insertion stitches, either left loose or attached to a background of calico, Vilene or canvas to show off the insertion stitches as well as the pieces of made fabric
- Use a vertical paper design based on Fibonacci both width wise and length wise, where each vertical piece hangs loosely as one complete piece or as several layers. Overlapping layers requires some translucency therefore shear fabrics were chosen and stitched or made with dissolvable film or fabric.
Here is a picture of the completed closed wall hanging (photographed at a window) showing the three layers
Finishing edges
There are a number of edges and five are mentioned here, of which I selected the sixth:
- Simple turned hem, flat or padded to form a frame of different widths
- Simple turned hem leaving a decorative front not requiring a frame
- A lining fabric added and stitched up to the edge
- Lining fabric stitched directly on to the back of the fabric
- Attach a fringe to the bottom of each length
- Edges left rough and untrimmed or not hemmed where the fabric almost has the final say
I selected the final method cutting the edge of each layer into a wave, (slightly different on each layer). I wanted the hanging to move in the breeze if at an open window or from other draughts from a door or people passing
Methods of hanging
There are several techniques
- Hidden methods using rings, tabs, sewn on to lining fabric or back of embroidered surface a few centimeters from the top edge
- Sew a channel between the lining and the front surface through which a rod or other could be threaded
- Visible methods sewn between the lining and embroidered surface, where the rod or other might be painted or dyed or wrapped with fabric
- Sleeve to enclose a rod with a hemmed seam into which can be slotted the hanging
- To hang these vertical strips it would be useful to adopt some tapestry techniques. There is one web site that describes a few different techniques in a simple way: http://www.wikihow.com/Hang-a-Wall-Tapestry
I chose one of the tapestry techniques where I made a sleeve for each rod and then attached each piece of each layer for stability within a hemmed seam. There are three rods in all and because the fitment is hinged the layers can be left all hanging over one another or opening each layer like a book where the back of one piece is alongside and to the left of the other hangings (Illustration in Chapter 10 is shown again here)
The sequence of sleeves on the rod in cotton are for tonal effect: mottled black(front layer), mottled grey(reverse of the first)(middle layer) and white (back layer).
Presentation of Supporting work as two A2 boards plus full and half size coloured paper patterns alongside
Research and design (1)
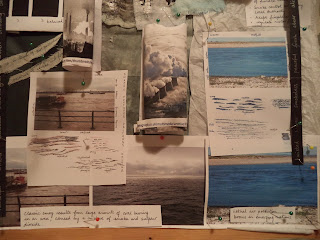
This A2 board shows photos, appropriate text related to three Clean Air Acts, water, smoke and sky photos and drawings, words and thoughts associated with the theme, black paper design (Fibonacci) where final decision was with four vertical lengths repeated over three layers and the Ringelmann Smoke charts used to measure levels of polluted or not smoke from chimneys
On the left is the full size paper designs, upper right part of one darker top layer which was based on an altered design bottom right
Research and design (2)
This shows different fabrics used including ribbons and some text on fabric, dissolvable fabric samples, twin needle, cable stitched and gathered stitch with copies of the three print blocks that were made of the chimneys (Intaglio). Each vertical length depicts the materials used in each layer from left to right, top to bottom. I also wrapped pipe cleaners with the threads used on each layer (inserted on the originals not here)
Finally here are a series of pictures showing the final hanging, layer by layer and one extra for each layer showing details of work
Front of top layer
Reverse of front layer
Detail on front layer
Front of Middle layer
Reverse of Middle layer
Detail from Middle layer
Front of Back layer
Reverse of back layer
Detail from back layer (not at window)
Front layer opened to show reverse with other layers on the right


I love your hanging Linda - delicate and ethereal but with a tough message.
ReplyDelete