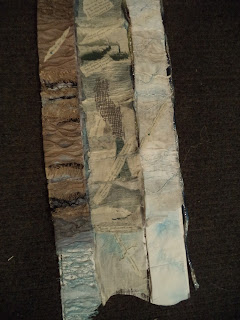
I see the wall hanging in layers:
Top layer depicting smog and high air pollution (Clean Air Act 1956)
Middle layer some improvements in air pollution (Clean Air Act 1968)
Back layer clear and less polluted skies and water (Clean Air Act 1993)
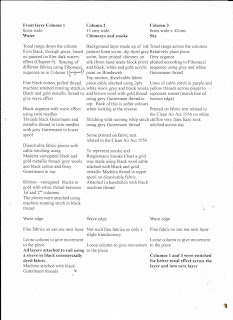
Working on each hanging, here are some of the techniques used:
Top layer (blurred- sorry)
Middle layer
Back layer
There have been changes from the original design. Initially had the tonal range from left to right, but as the work progressed because in general the water hangings were darker I decided to alter the arrangements. So, for each hanging placed the water hanging first, then middle one remained in place, with the sky hanging last. The ribbon moves from left to right across the hangings.
There has been a small group of friends that have met and I have welcomed their comments and ideas. The last meeting was on Tuesday 15th March 2016.
 |
| One regular person is missing making seven of us (there was a visitor this day) |
- They suggested switching the arrangement and I agree the tonal range across each hanging flows better into the next
- When attaching the layers to the rods I propose a covered fabric open at each end - dark, medium grey and white and they felt it would be best to attach the first layer using dark fabric to the top rod, revealing the tonal range as the rods open
- The sleeves on the rods to be open ended revealing the metal ends and the pieces attached directly on to the fabric sleeve
- I was considering adding some net to the middle hangings but in general we felt this was not required
- Decided to retain the rough edges around each hanging
- Shaped edge at the bottom of each layer enhanced the design, and they felt a fringe or further additions to hang down may not be required although possibly a covered washer or beads to weigh down the ribbon may be good
- The representation of Ringelmann Smoke charts I feel is important as they gauge the quality of pollution from the chimneys. I could either make some using dissolvable fabric and cable stitching appropriate coloured threads or, I felt it would be more successful to provide grids shaped haphazardly like the smoke located above each chimney
The next three show more detail of the stitching on the uncompleted pieces
Working on the hangings including the grids. Using a selection of threads for cable stitching on to dissolvable fabric
Here are a series of photos of the completed hangings
Layers on top of one another alongside original design drawings
Top layer with others underneath
Top layer opened up, revealing back of it and the remaining two layers on top of one another
Middle layer on top of the top layer (back view) revealing back layer
Back view of all layers on top of one another
The nature of the fabrics used and stitching does allow to see through at least two layers at a time.
The back of each layer is less complex in stitch but does not detract from the main stitching on the front of each. Also it blends with the next layer in the sequence when it is alongside it.
Finally as a lead on to Chapter 11 here is some initial work on the attachments for each rod.
The location of the hanging could be in front of two windows with a wooden section between wide enough to attach the main fixture for the rods.
The nature of the sleeves also allows some versatility, such as allowing the hanging to be removed from the rods and hung separately in a type of triptych or as preferred.
I am now working on hanging each layer
Overall I think the piece does have a smokey effect as required with a clearer presentation on the back piece
I am reluctant to add further stitches, fringes or beads, but maybe this could be considered.
In Chapter 11 will be clearer photographs of each layer and their translucent effects against a window.


No comments:
Post a Comment